Tinkers Projects
Imagine | Develop | Create
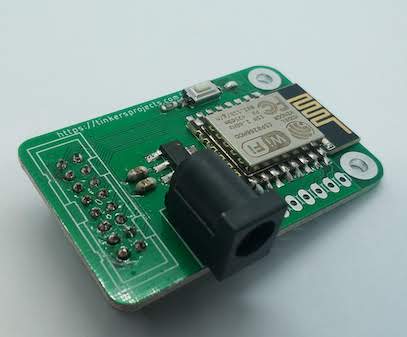


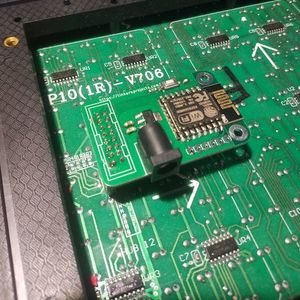

I have ad this display for years have always wanted to get it out and play with it but I had no idea what to do with it. Then I thought I could make a variable digital display that can display the Time, countdown timer, weather, text and more. This is the result of that idea, a display that can get information from the internet and display it.
How it works
Controller
The controller is using the ESP8266 in the ESP-12E package and it sends data to the LED display. The ESP8266 is powered from a 3.3V power supply regulated down from 5V. The 5V is also used to power the LED display. The button on the PCB is used to program the controller but could be used as a function or to select modes or brightness.
Program
the program simply connects into the selected Wifi internet connection and downloads information from https://project.tinkersprojects.com (see below). This site is a system I have made to keep track of all projects, parts, IoT devices and more with more getting added all the time.
On this site, the display can be configured to display what is needed including time, text and countdown timer. Once this information is downloaded, the controller uses the P10_BitBang (see below) to formate the display and send the data to the LEDs.
The current program is below.
Sponsored By
This project was sponsored and manufactured by PCBWay.
PCB way has done a great job of manufacture this PCB. The shape, silkscreen, solder marks and copper layers look and work great. The PCB is the same as the design files.
Over the years I have been with PCBWay, I'm ways amazed at what they can do in the days and how they can keep improving their PCBs and service.
Go to https://www.pcbway.com/ to see what they can do for you


