Tinkers Projects
Imagine | Develop | Create
Focusrite Scarlett 6i6 Repair


Focusrite Scarlett 6i6 Repair
I saw this device on gumtree, broken for $35 and there was not much information about what was wrong with it. I thought for $35 I could try and get it fixed and working again and if I can't, there will be some nice parts in it.
When I picked it up, the users that broke the device told me that he used a laptop power supply on the device which delivered to a higher voltage to the device. Thinking about this, I was hoping for a fuse or something that has been blown internally.
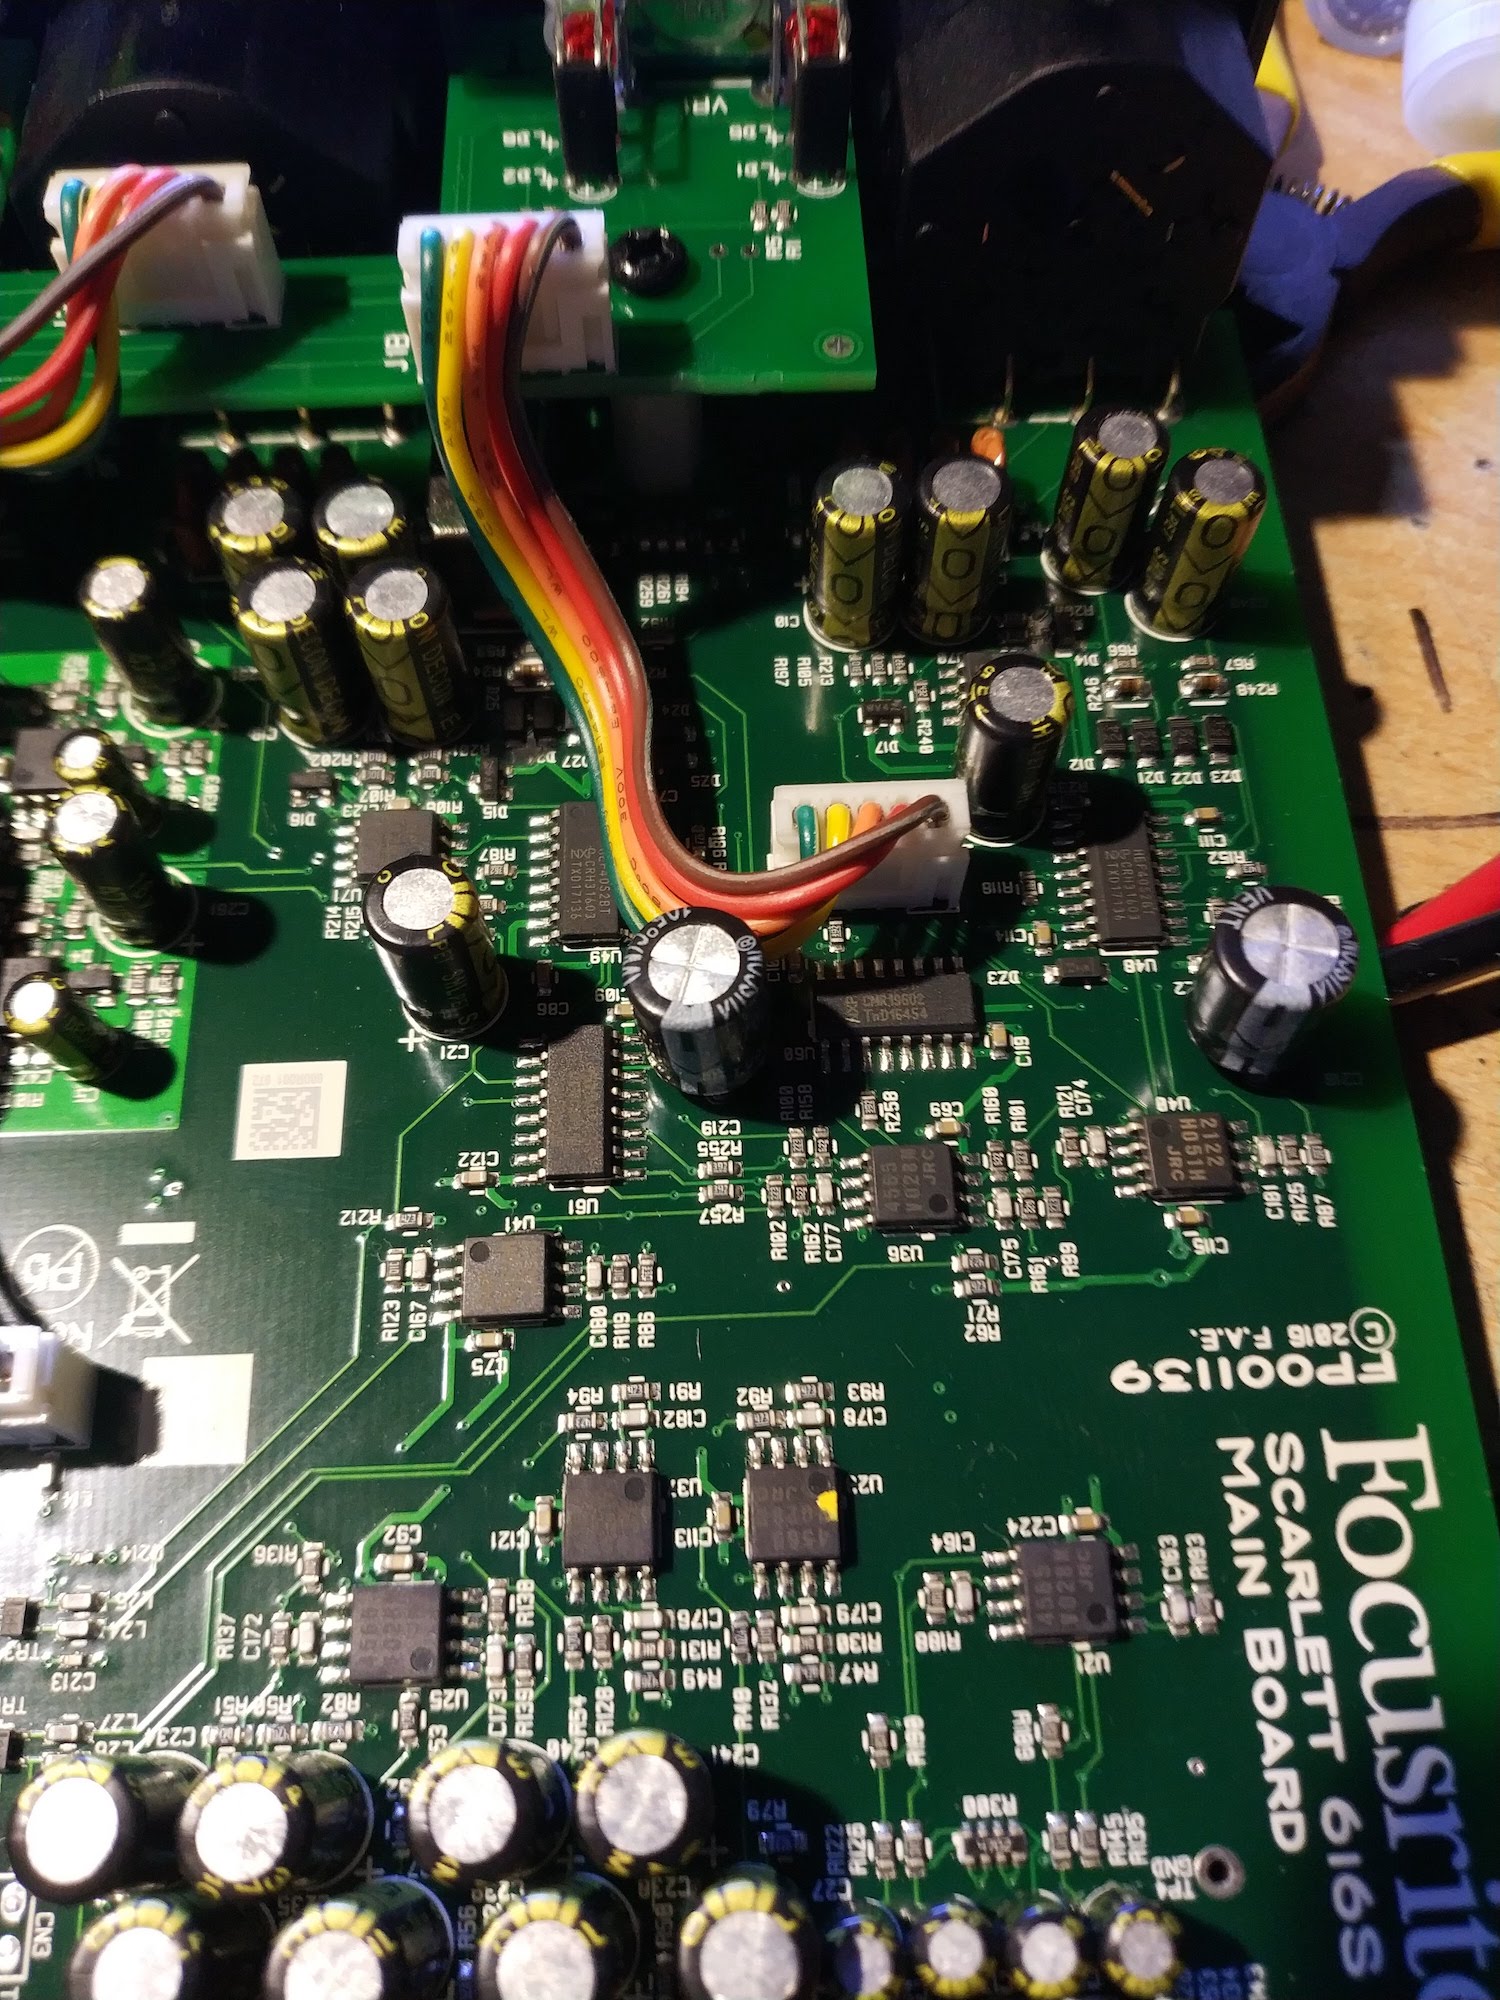
The Device
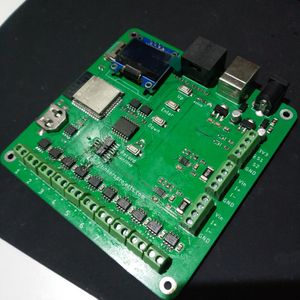
The device I found to be really nice inside and the designs had taken a lot of time to think through all the parts of the design. the case was quick and easy to take apart and I loved how it just slid out of the aluminum case.
The only problem I had with the device was downloading the correct software and getting it to run. my computer did not want to allow the device to plug and play, I could not get any sound out of the device. Once everything was installed, it worked great. I really like to configurations settings for the device and the ability to route the audio in the device.
The Repair
It took a bit of time to work out what was going on but got there in the end, it took about 2-3 hours.
The first thing I did was to work out what it was doing when the correct voltage was connected. I connect the device to my lab power supply at 12V and about 1A for a start to see what happen. For this test, I'm looking for no current for too much current. When the device first boots, it should not use more than 0.5A. As expected the device wanted more current which was a problem. This means that there is probably a short or burnt-out device.
The device has 3 power regulators to power the system at different voltages, 3.3V, 7V/-7V and 48V/-48V. One or more of these power regulators could have been damaged. I went through and disconnected each one from the main 12V then tested the power again. This will just test the protection circuit before the 3 power regulators and when I turn the power on, the problem was still there. this means that it may not be the 3 regulators.
I started poking around the protection circuit and came across a Zena diode. since there was no regulators attached, this Zena diode was not doing much so I tested it and later removed it. After removing it and testing it, the diode was shorted and therefore broken. I replaced the Zena diode and powered the circuit and the short was gone. I re-attached the 3 power regulators and the device started working again.
Before re-assembling the rest of the device, I ran some tests to see if the device had any other problems.
Re-assembling was quick and easy.
Overview
Great device, well thought out but getting/downloading the software was a bit difficult.
It was also good to see that the protection circuit more or less worked. it protected the device.
I saw this device on gumtree, broken for $35 and there was not much information about what was wrong with it. I thought for $35 I could try and get it fixed and working again and if I can't, there will be some nice parts in it.
When I picked it up, the users that broke the device told me that he used a laptop power supply on the device which delivered to a higher voltage to the device. Thinking about this, I was hoping for a fuse or something that has been blown internally.
The Device
The device I found to be really nice inside and the designs had taken a lot of time to think through all the parts of the design. the case was quick and easy to take apart and I loved how it just slid out of the aluminum case.
The only problem I had with the device was downloading the correct software and getting it to run. my computer did not want to allow the device to plug and play, I could not get any sound out of the device. Once everything was installed, it worked great. I really like to configurations settings for the device and the ability to route the audio in the device.
The Repair
It took a bit of time to work out what was going on but got there in the end, it took about 2-3 hours.
The first thing I did was to work out what it was doing when the correct voltage was connected. I connect the device to my lab power supply at 12V and about 1A for a start to see what happen. For this test, I'm looking for no current for too much current. When the device first boots, it should not use more than 0.5A. As expected the device wanted more current which was a problem. This means that there is probably a short or burnt-out device.
The device has 3 power regulators to power the system at different voltages, 3.3V, 7V/-7V and 48V/-48V. One or more of these power regulators could have been damaged. I went through and disconnected each one from the main 12V then tested the power again. This will just test the protection circuit before the 3 power regulators and when I turn the power on, the problem was still there. this means that it may not be the 3 regulators.
I started poking around the protection circuit and came across a Zena diode. since there was no regulators attached, this Zena diode was not doing much so I tested it and later removed it. After removing it and testing it, the diode was shorted and therefore broken. I replaced the Zena diode and powered the circuit and the short was gone. I re-attached the 3 power regulators and the device started working again.
Before re-assembling the rest of the device, I ran some tests to see if the device had any other problems.
Re-assembling was quick and easy.
Overview
Great device, well thought out but getting/downloading the software was a bit difficult.
It was also good to see that the protection circuit more or less worked. it protected the device.